How to setup Deskhero with Shopify
Learn how to get started with the Shopify integration for Deskhero in these simple steps.
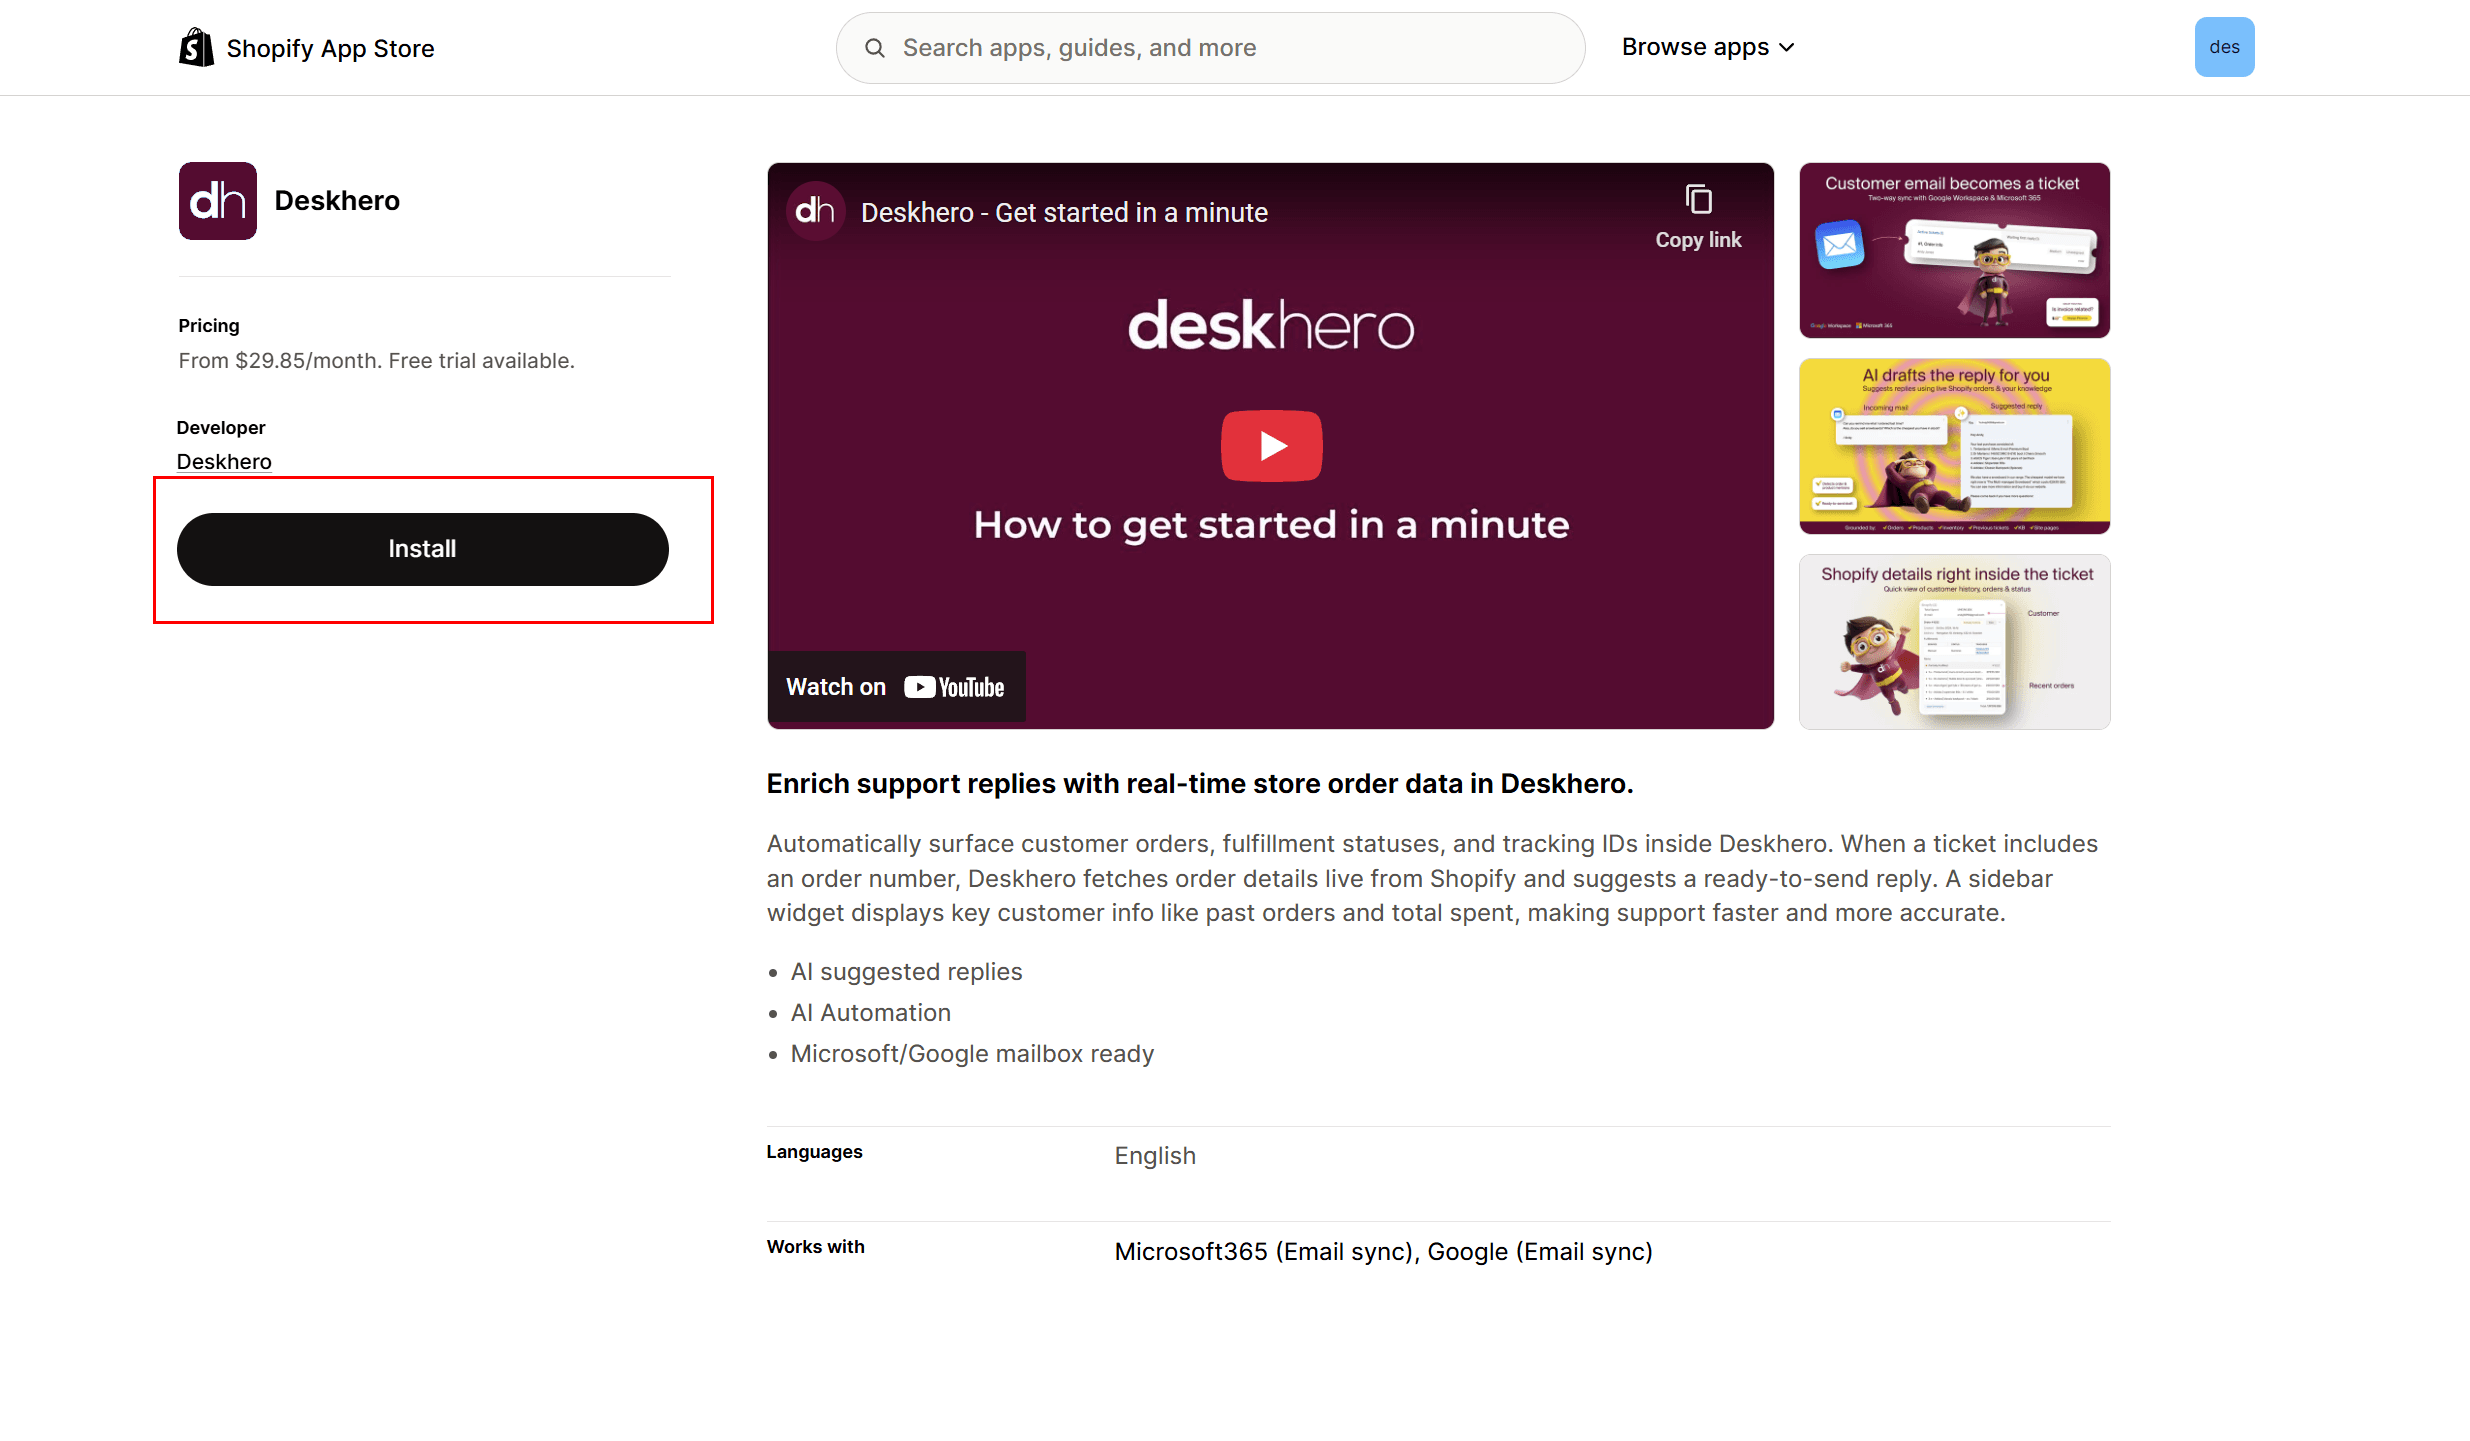
1) Navigate to Deskero's app store listing at Shopify: https://apps.shopify.com/deskhero
Click Install
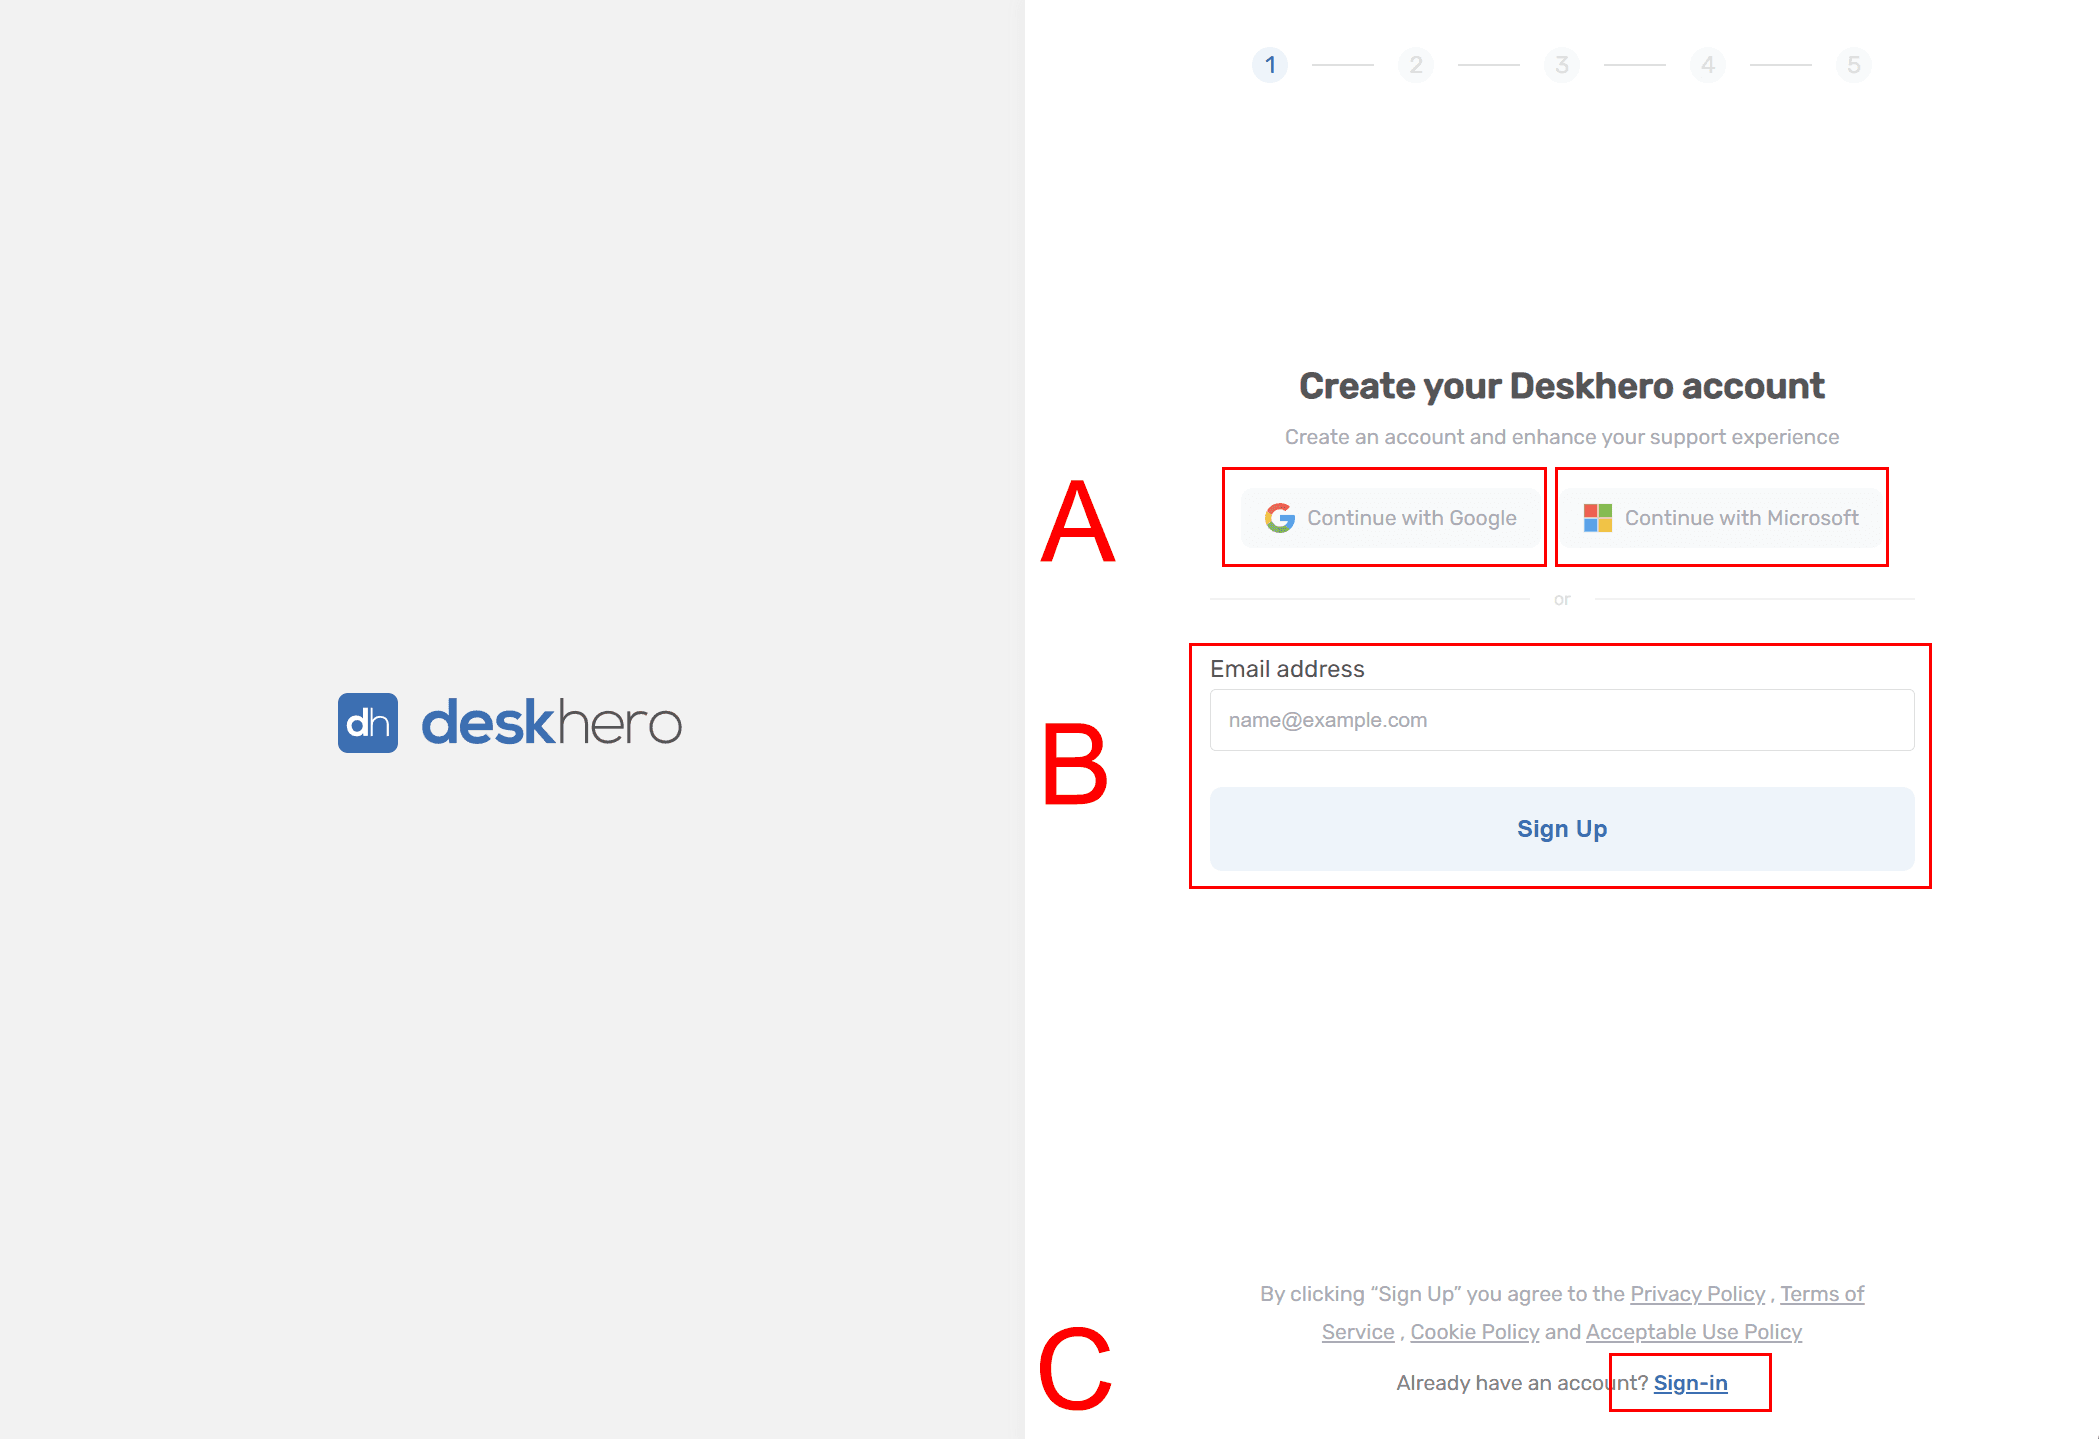
2) You will be redirected to Deskhero Sign-up screen
You have a few options here
A) Sign up using Microsoft or Google account (recommended) B) Sign up using email+password C) Sign in (if you already have an account and workspace created)
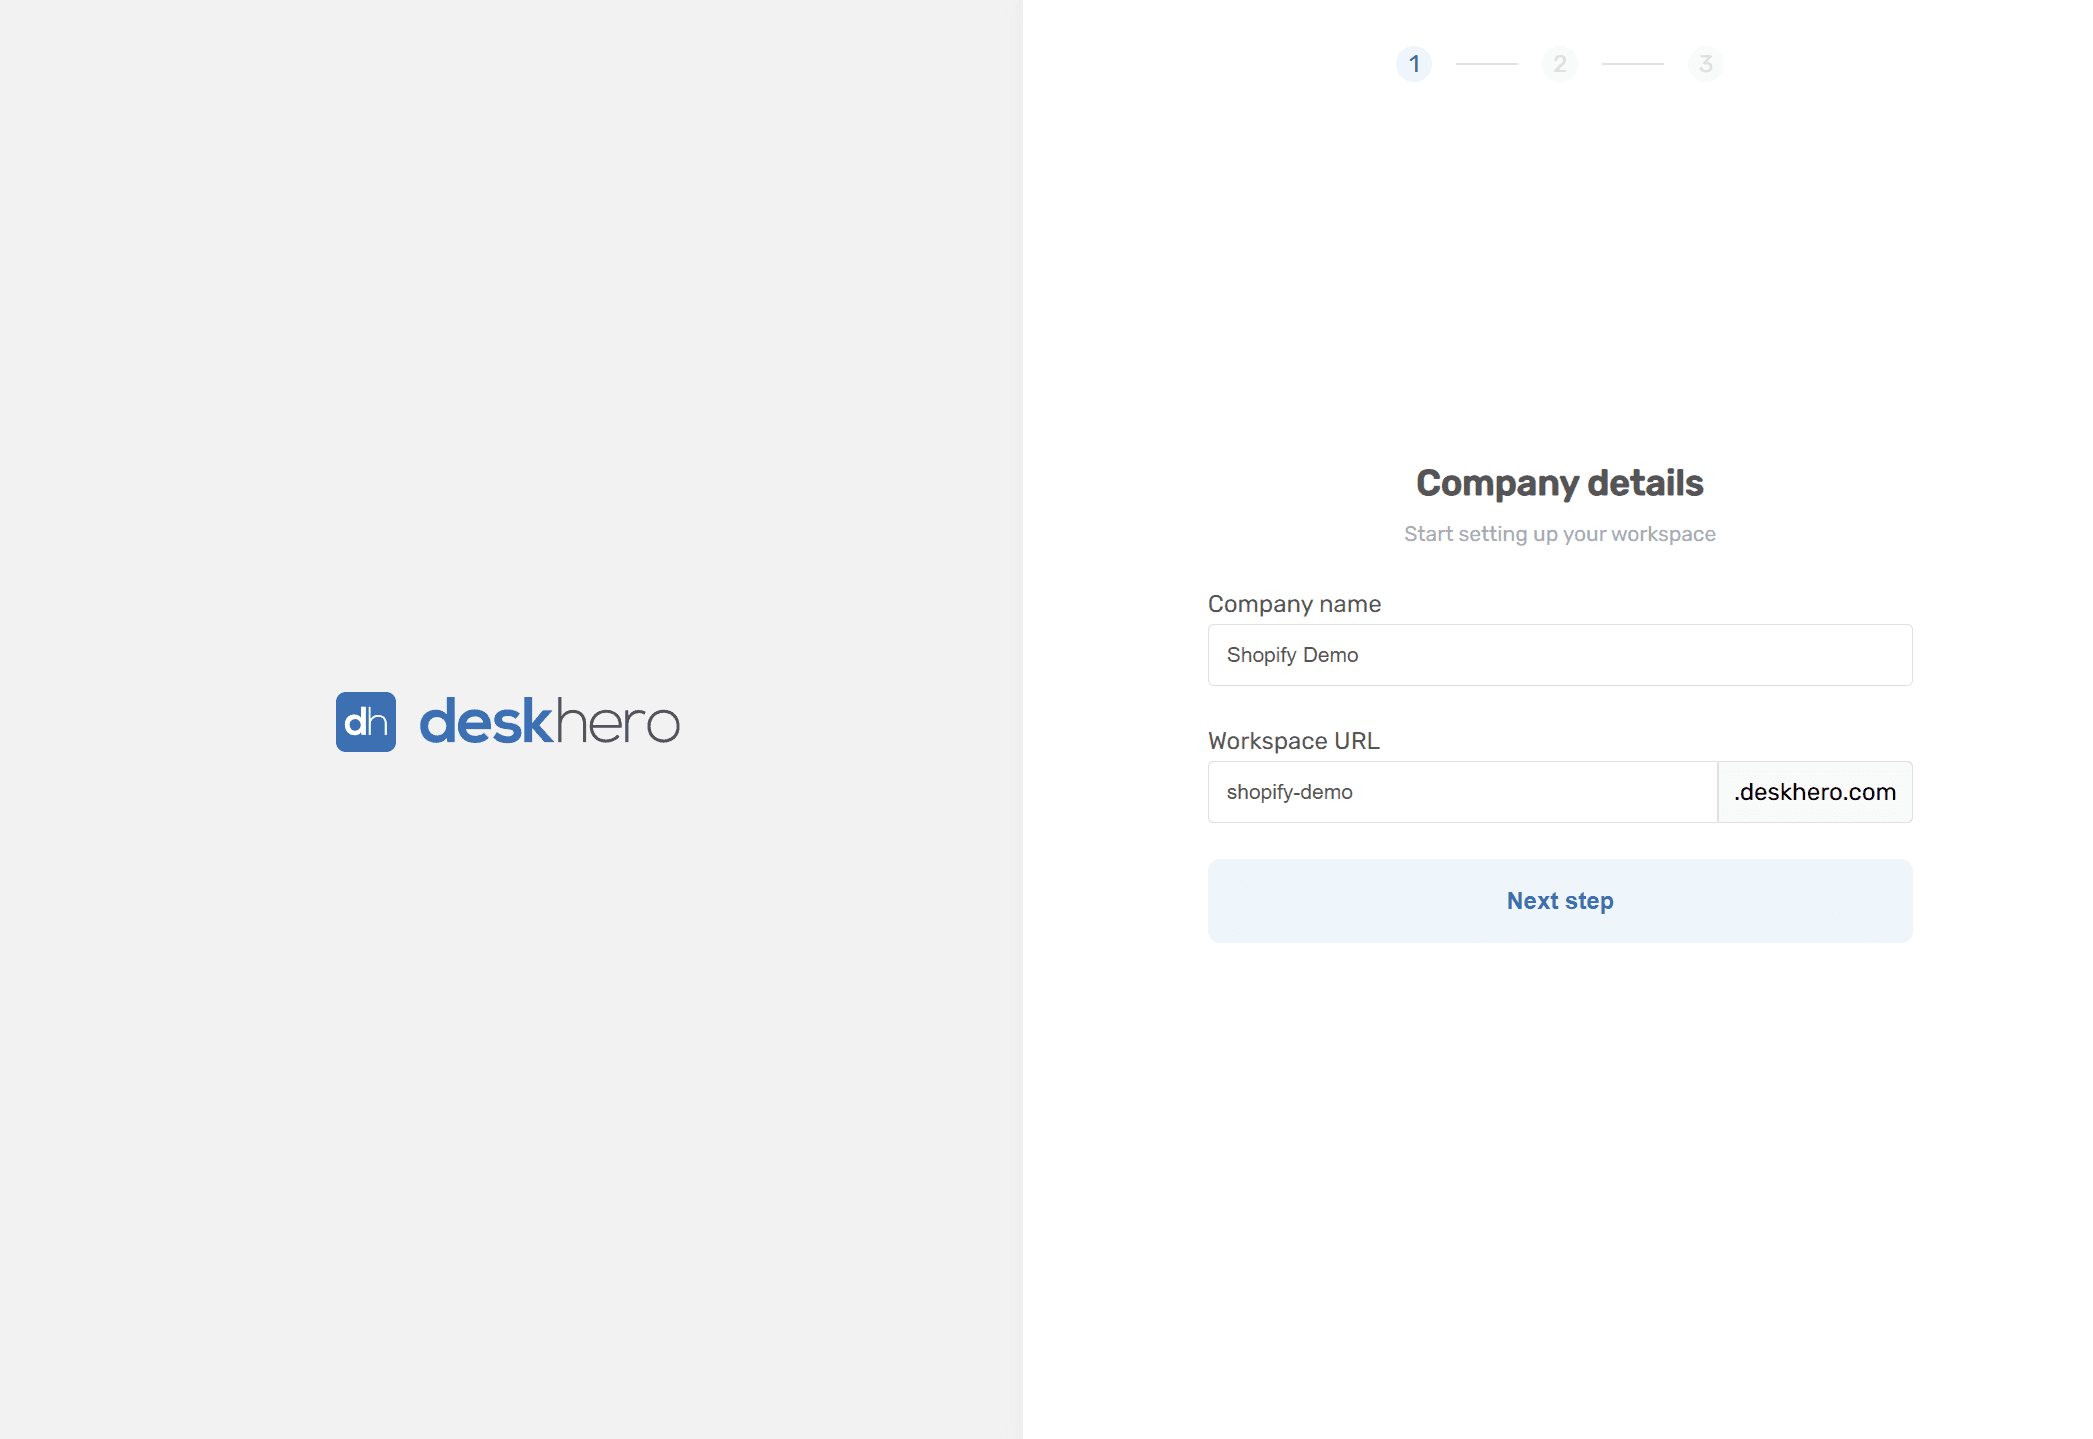
3) Create workspace
Add your company name and chose a workspace URL (eg: company.deskhero.com)
Note: If you sign up with email+password, you will first be asked to verify your email, setup password, name etc
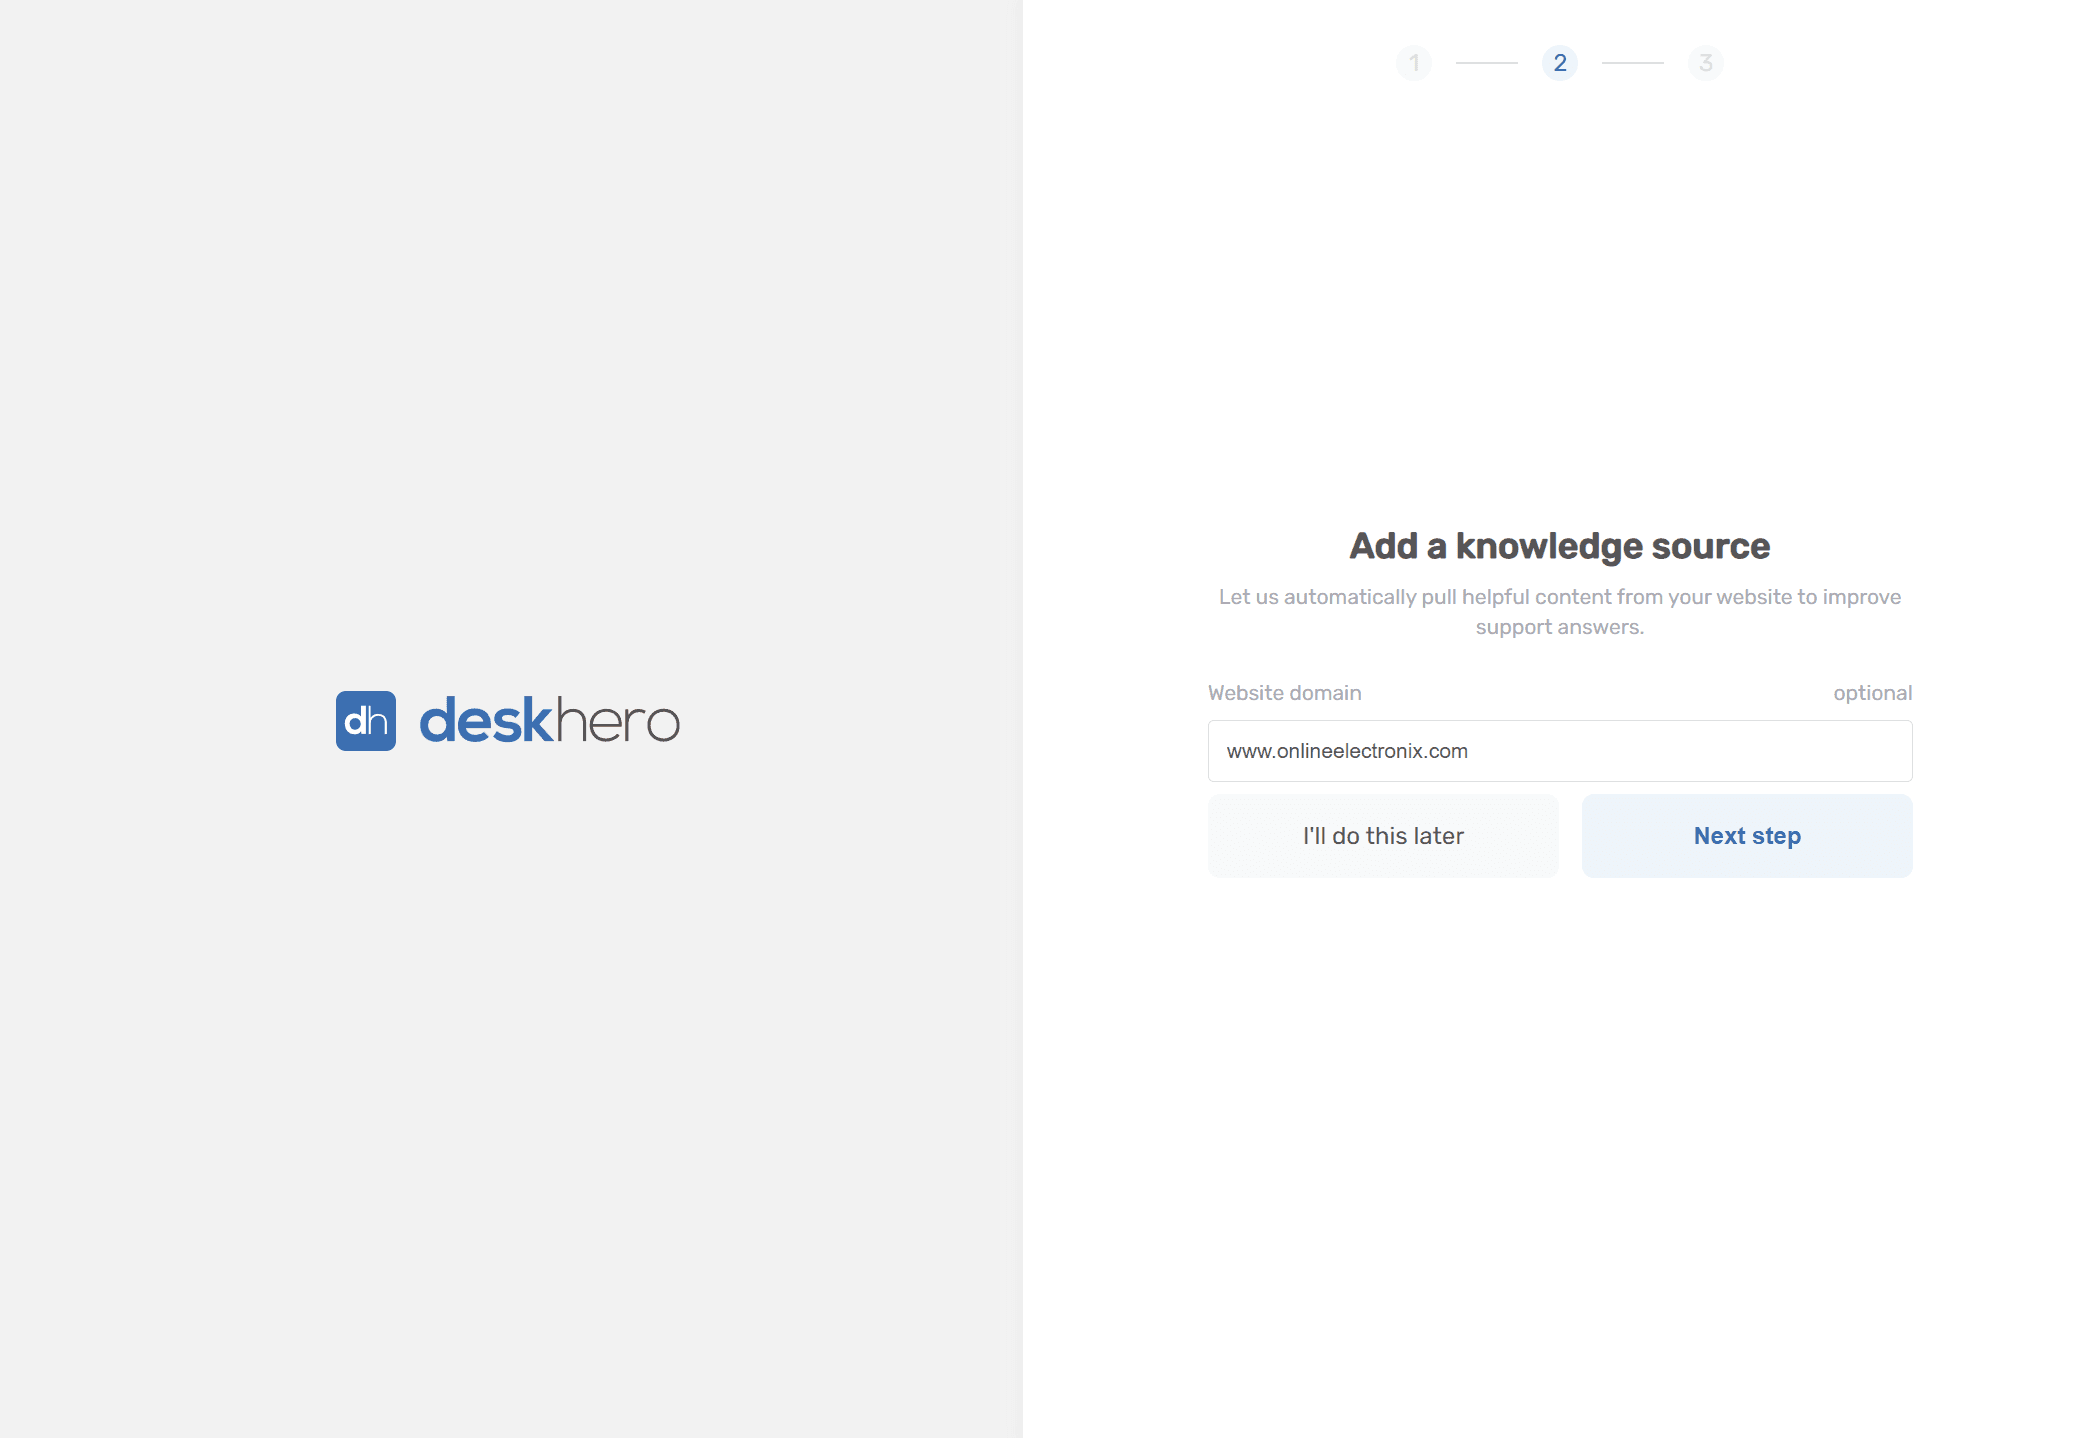
4) Add your company website URL for knowledge retrieval (recommended)
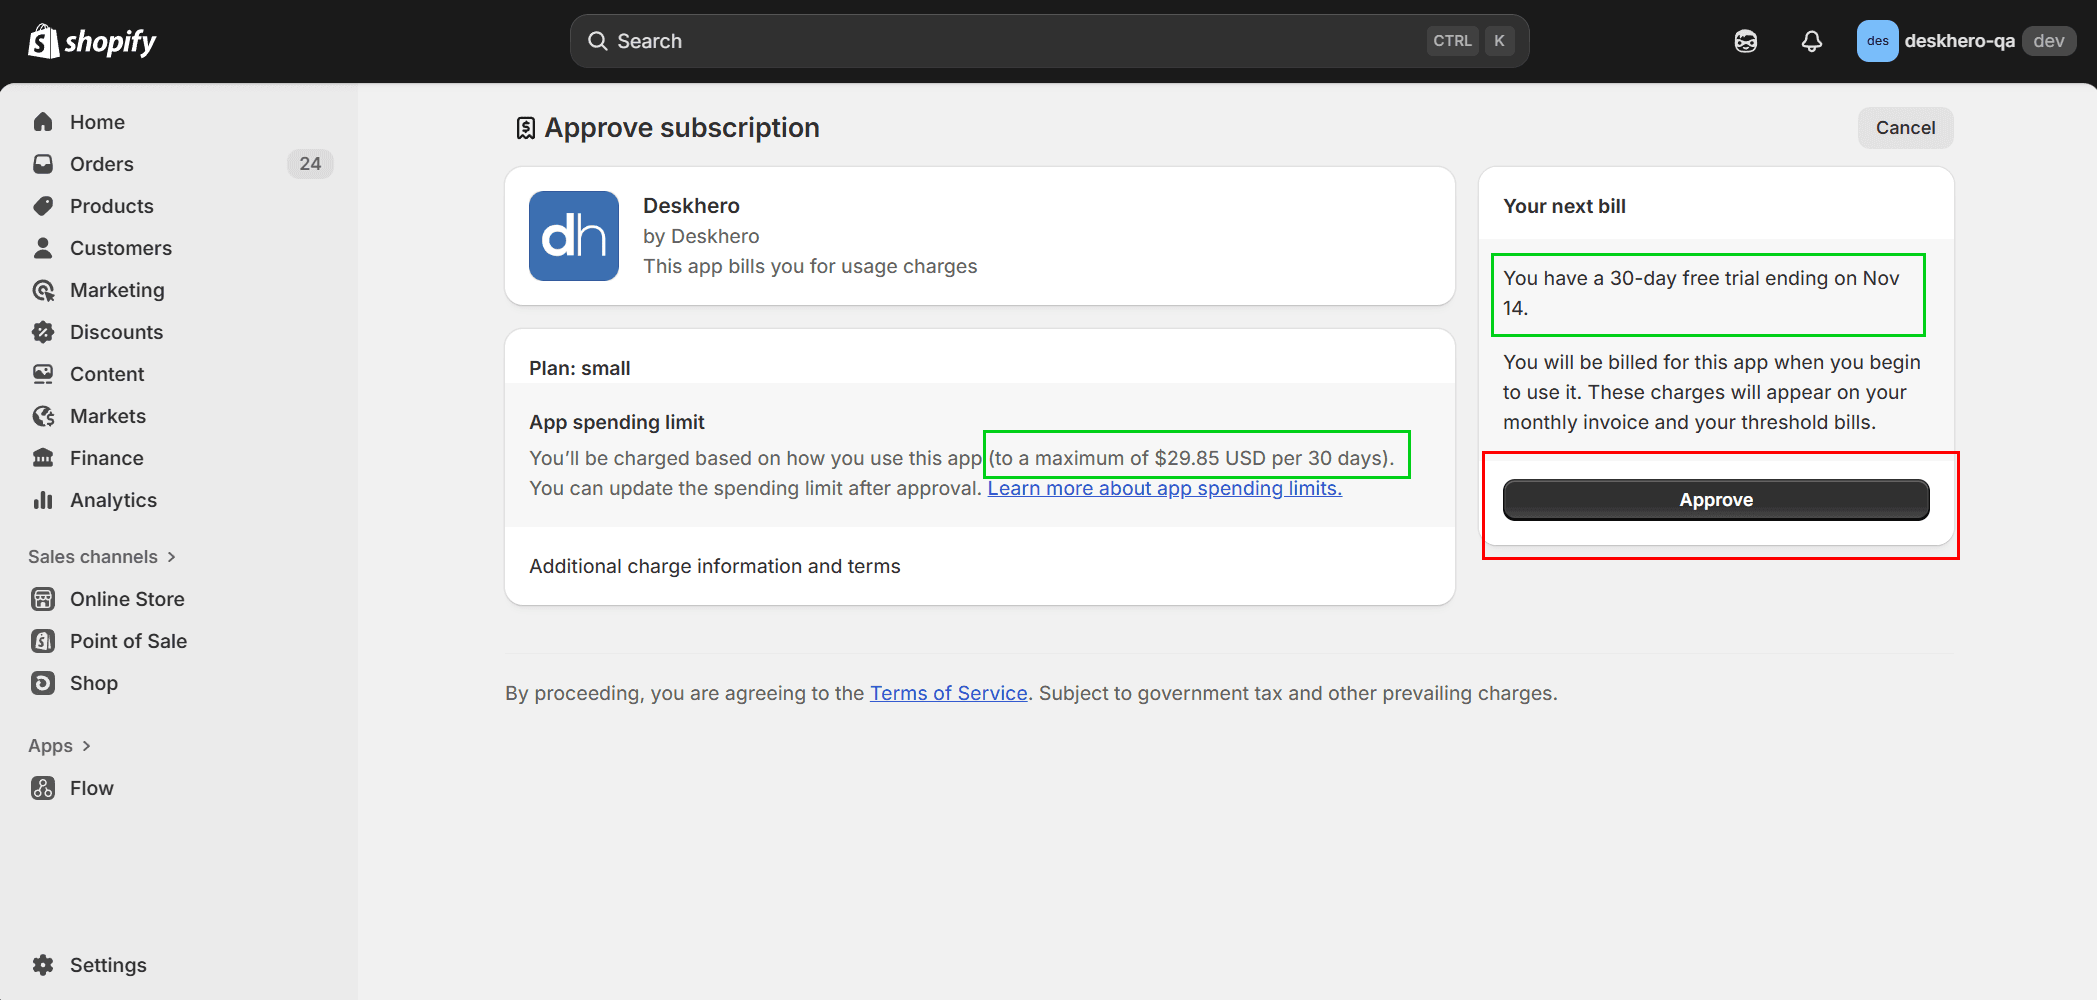
5) Approve the Shopify app installation
You will be redirected back to Shopify to approve the terms. 30-days free trial applied on new accounts
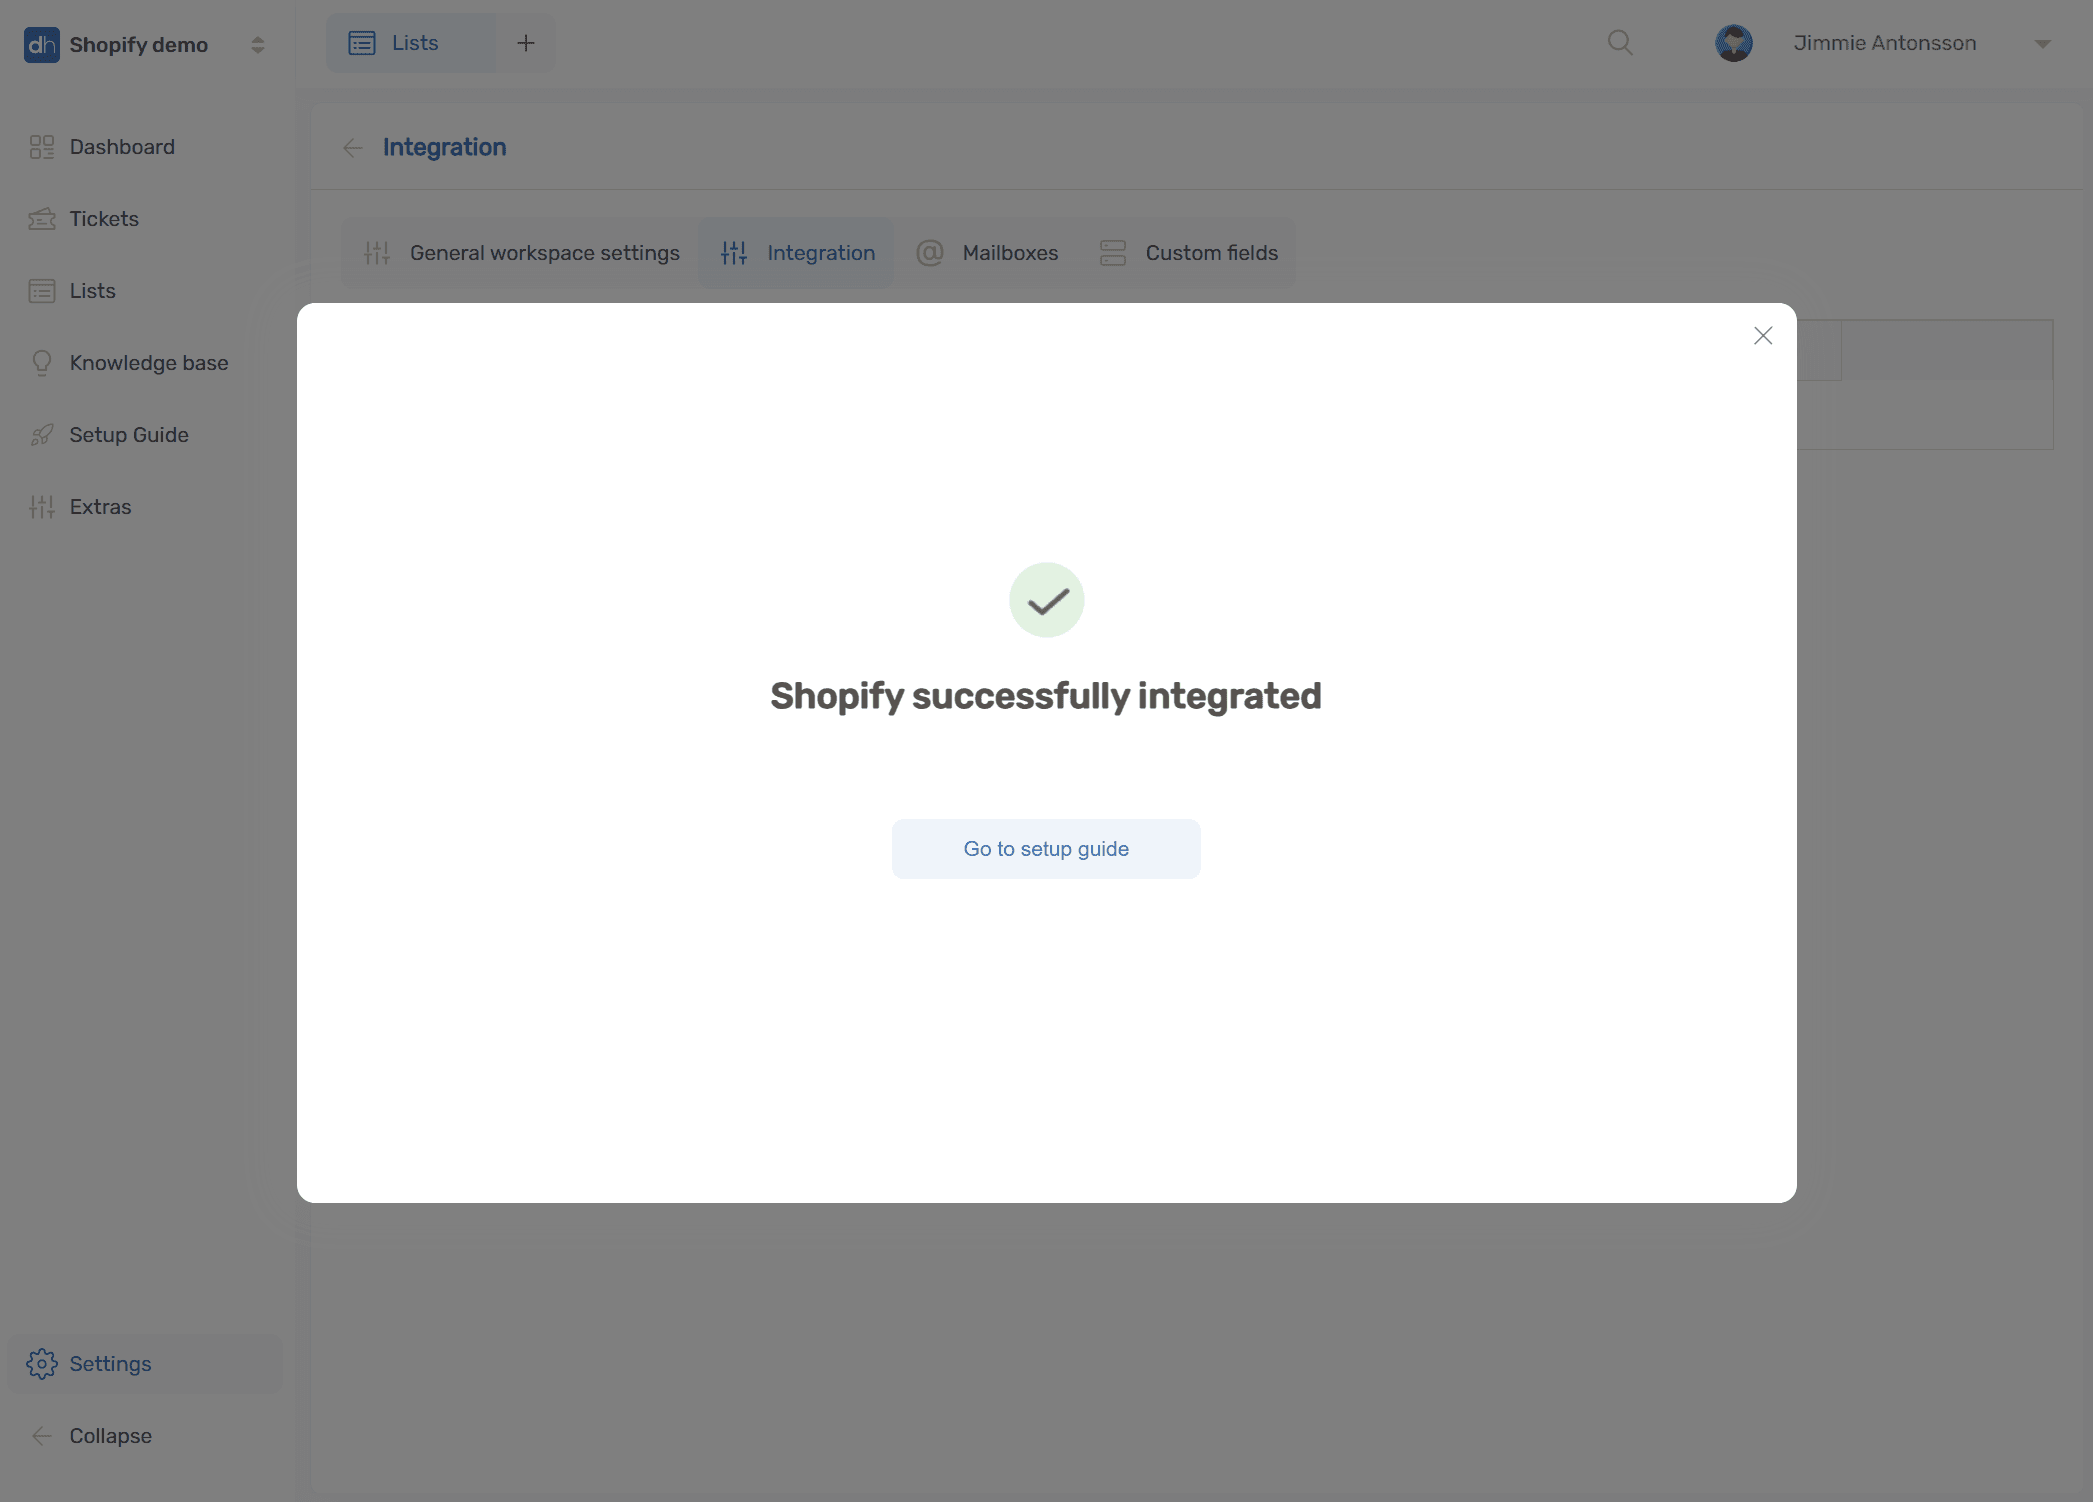
6) Integration created message. You will be redirected back to Deskhero with a confirm message.
Continue by clicking "Go to setup guide"
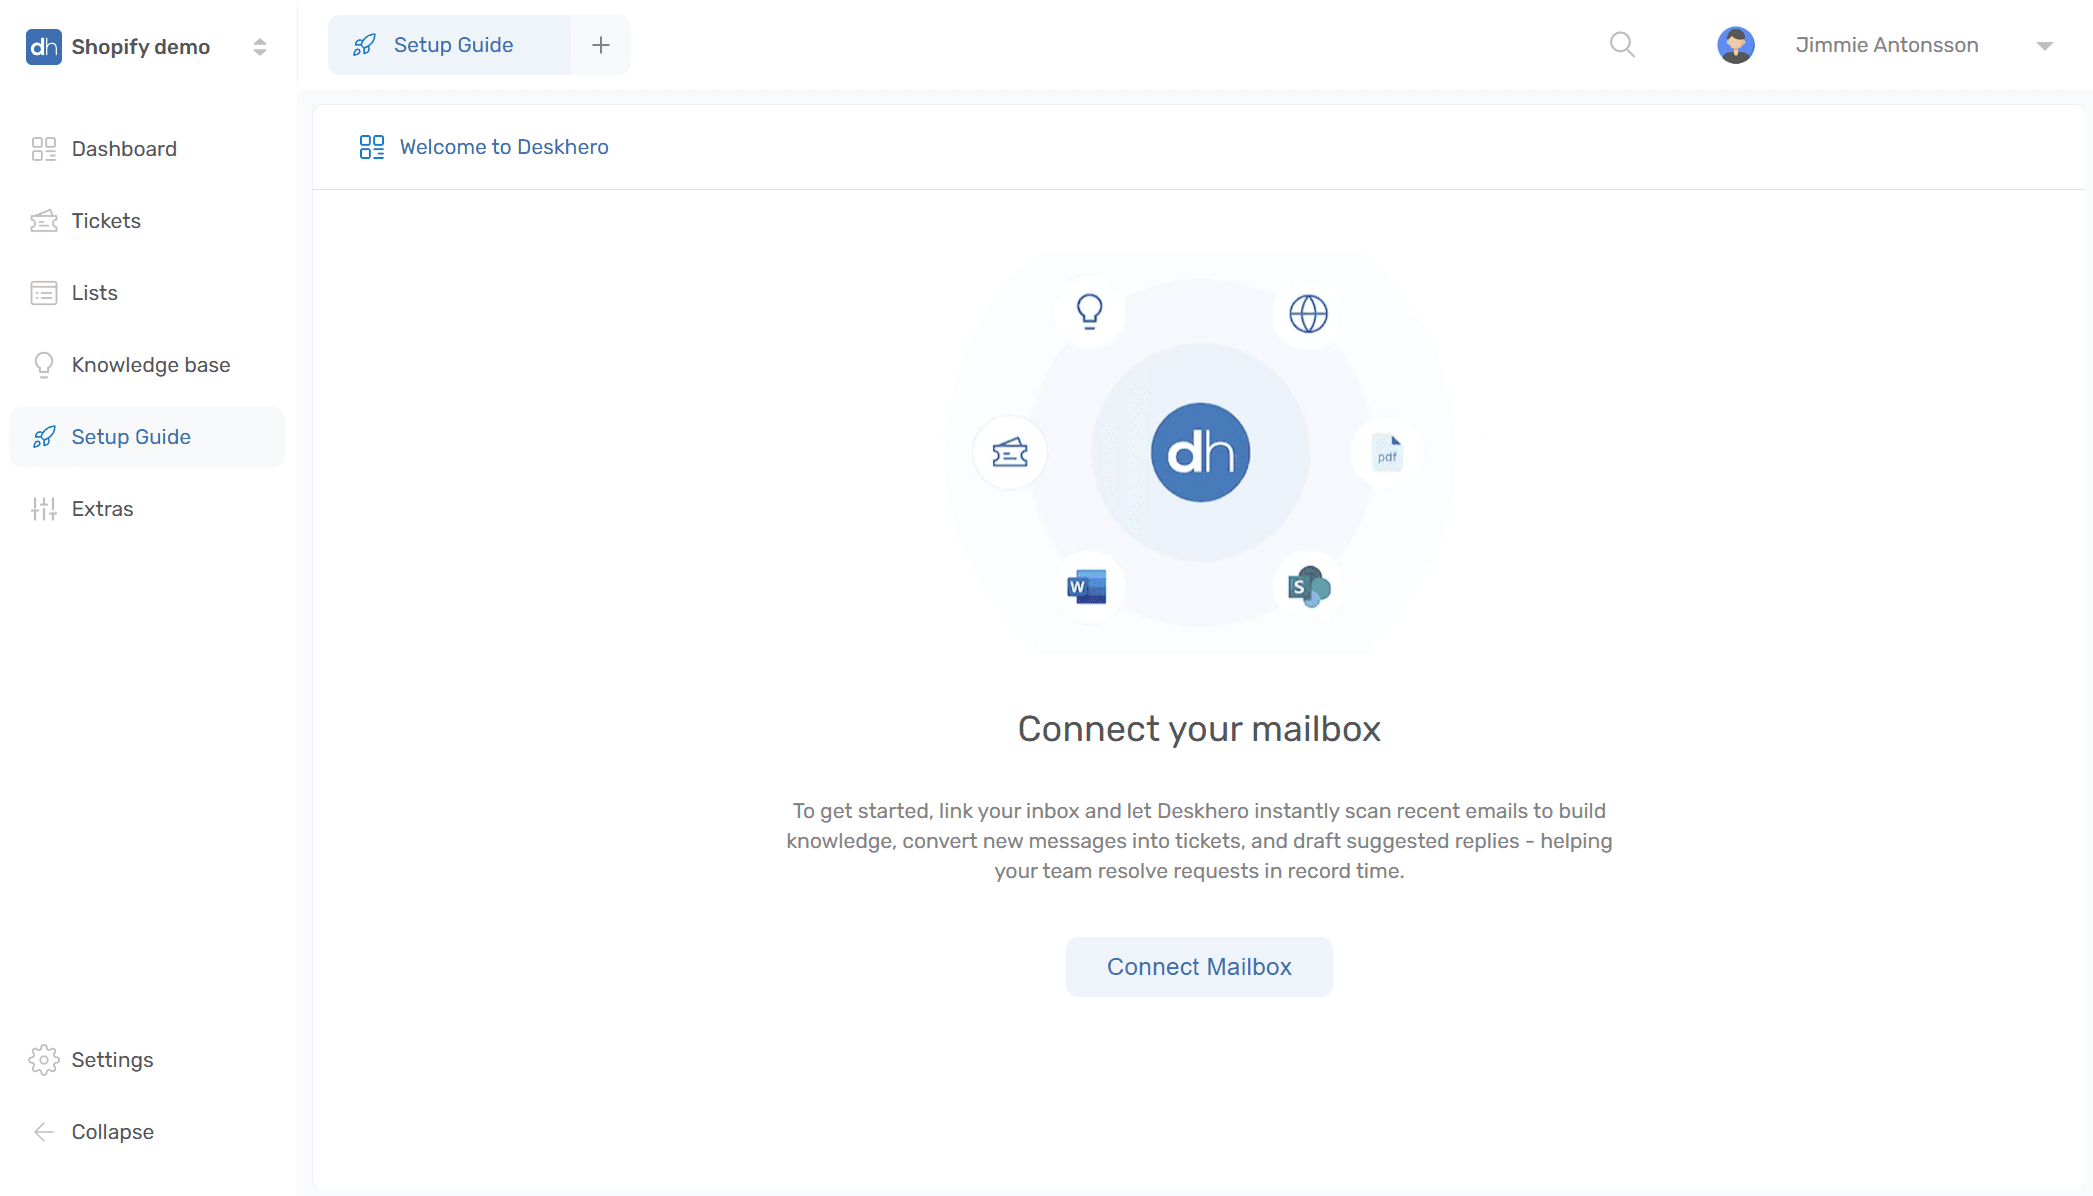
7) Follow the setup guide to connect your mailbox
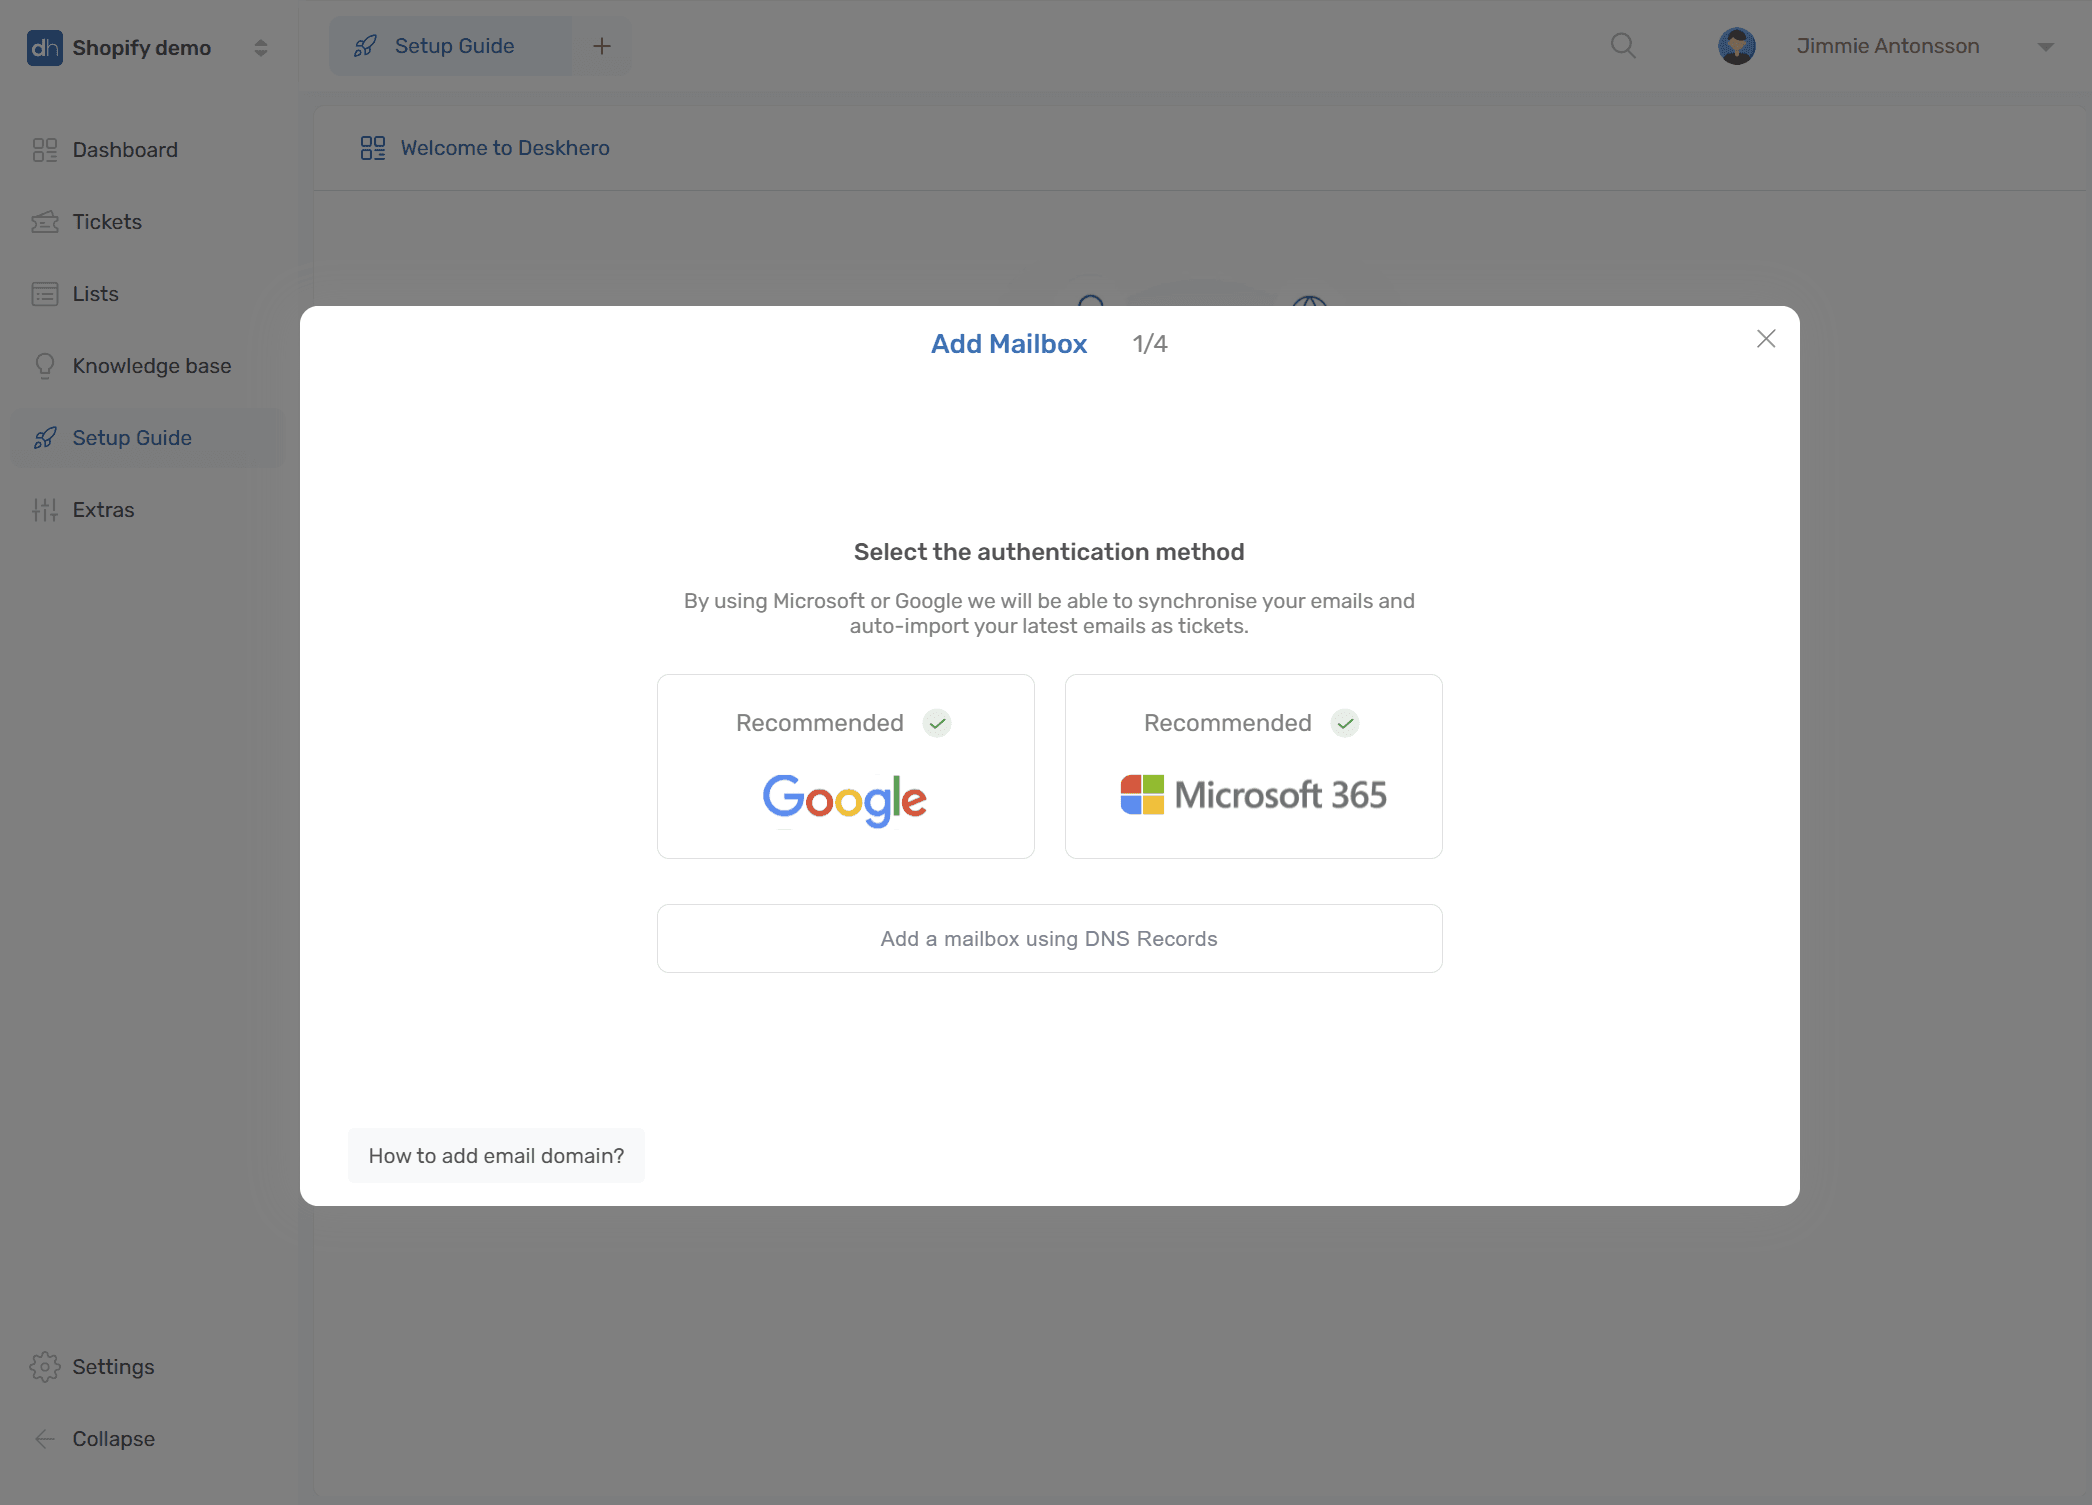
8) Deskhero has a 2-way sync and an an easy flow for Microsoft365 and Google workspace mailboxes.
Follow the on-screen guide, or read more about the setup here - Microsoft - Google
If you have other mailbox providers, use the DNS option
9) Done. New incoming messages will show up as tickets, and suggested replies will now be generated with Shopify store data