Easily integrate Deskhero’s ticketing system into your website with a simple HTML snippet. This allows your customers to submit tickets directly from your site, ensuring a seamless support experience.
The form can be embedded either as
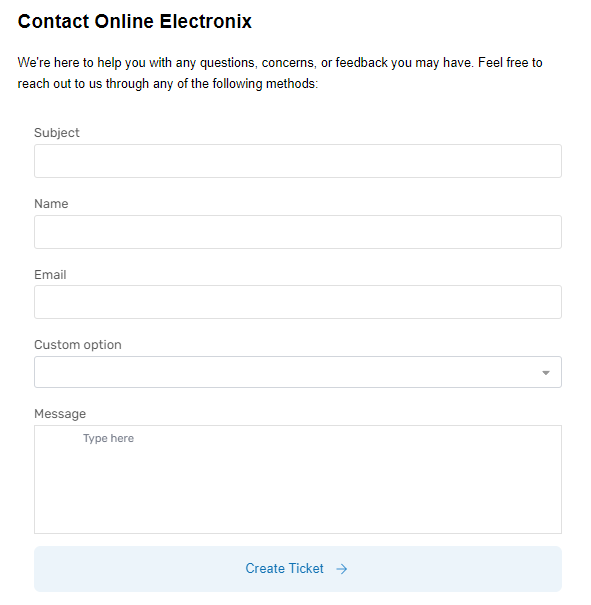
- a form directly on a page, Check out this example https://www.onlineelectronix.com/contact.html
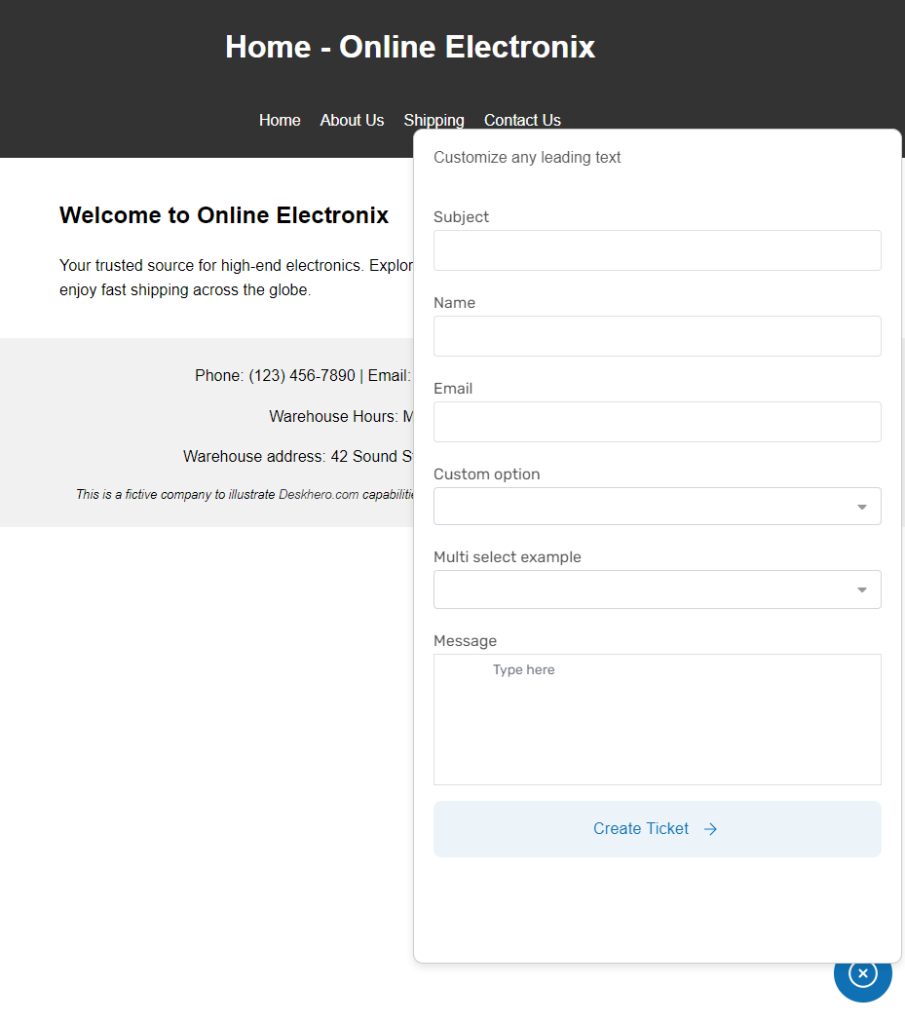
- a floating “pop up modal” that can be integrated on all pages, Check out this example https://www.onlineelectronix.com/index.html
Embed directly on a page
Embed as a floating pop up
Step-by-Step Instructions
Insert the HTML Code:
Copy and paste the following HTML snippet into the code of the page where you want the form to appear:
<script src="https://[YOUR_TENANT_DOMAIN].deskhero.com/dh-form.js"></script>
<dh-form url="https://[YOUR_TENANT_DOMAIN].deskhero.com/external/forms/dynamic?group=support"></dh-form>
The <script> tag should ideally be placed inside the <head> tag.
The <dh-form> tag should be placed where you want the form to appear
Floating / Pop up option
To embed as a pop up, add floating=true as option in the <dh-form> element
<dh-form url="..." floating=true></dh-form>Language support
We currently support a range of languages, as “SV”, “NB”, “DA”, “ES”, “DE”, “IT”, “FR”, “NL”, “TR”, “ZH”, “UK”, “LV”, “PT-PT”.
See customization options section on how to configure it
Customization Options
Assigning Ticket Groups:
Customize which team receives the tickets by modifying the group parameter in the form URL. For example, to direct tickets to your Finance team, use group=finance.
Language
Append &lang=xx to the form URL
Adding Custom Fields:
Enhance the form by adding custom fields. For instance, to include fields for ‘Invoice Number’ and ‘Invoice Reference’, append fields=invoice_no&fields=invoice_ref to the URL:
For example, if you want the ticket to be assigned to the group finance, and you want to include two custom fields called “Invoice number” and “Invoice reference” the form URL would be:
https://[YOUR_TENANT_DOMAIN].deskhero.com/external/forms/dynamic?group=finance&fields=invoice_no&fields=invoide_ref
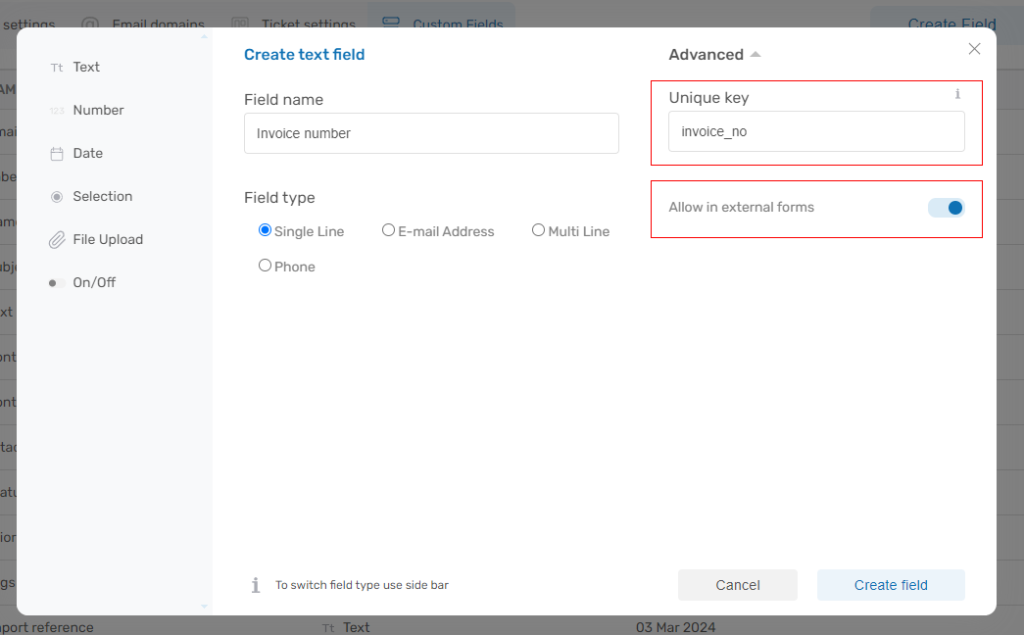
Remember, each custom field should be enabled for external forms in your Deskhero settings under Settings > Custom Fields.
Important Notes
- The
fieldsparameter corresponds to the “Unique Key” found in the advanced settings of your Deskhero portal.