Outlook Shared Mailbox Setup and Troubleshooting

An Outlook shared mailbox gives multiple Microsoft 365 users one address for reading and replying to email. To set one up, ask an Exchange admin to create the mailbox, add the Users who need access, and grant Full Access plus Send As permissions. Microsoft says the mailbox account should remain blocked from direct sign-in and explains the current storage and licensing rules in its shared mailbox guidance.
Quick checklist:
- Admin action required: Create the mailbox in the Microsoft 365 admin center (Teams & groups > Shared mailboxes)
- Permissions to request: Full Access (to open and read) + Send As (to reply as the shared address)
- Sign-in: Keep the shared mailbox account blocked from direct login
- Outlook client support: New Outlook for Windows, Classic Outlook desktop, Outlook on the web (OWA), Outlook for Mac, and Outlook mobile (iOS/Android) all support shared mailboxes
- Help: Microsoft Support and Microsoft Learn are the authoritative references for setup and troubleshooting
Table of Contents
- What is a shared mailbox and when should you use one?
- How does an admin create a shared mailbox in Microsoft 365?
- What do Full Access, Send As, and Send on Behalf actually mean?
- How do you add a shared mailbox in each Outlook client?
- How do you use a shared mailbox on Outlook mobile?
- How does sending and Sent Items work in a shared mailbox?
- What are the storage limits and when do you need a license?
- How do you fix a shared mailbox that is not showing up or sending correctly?
- What are the real limitations of shared mailboxes and how do you manage them well?
- Key Takeaways
- The shared mailbox works until it does not
- When your team outgrows the native shared mailbox
- Useful sources
- FAQ
What is an Outlook shared mailbox, and how is it different from a distribution list?
A shared mailbox is a delegation-based mailbox tied to a common email address, such as support@yourcompany.com, info@, or reception@. Authorized team members use their own accounts to open, read, and reply from it. It is not a distribution list, which distributes messages to members, or a personal mailbox with shared access. It is a distinct mailbox object in Exchange Online that multiple people manage together.
Common use cases:
- Customer support: A support@ address where Users monitor and respond to incoming email
A small support team handling a manageable volume of email can often work entirely from a shared mailbox with no additional tooling.
That said, there are scenarios where a shared mailbox is the wrong tool. If you need to send newsletters or announcements to a large audience, a Microsoft 365 group or distribution list is a better fit. For teams with litigation hold, advanced compliance, or e-discovery requirements, review Microsoft's current licensing guidance. If your team needs ticket assignment, duplicate-reply protection, SLA tracking, or customer history across conversations, a dedicated helpdesk platform may be a better fit.
How does an admin create a shared mailbox in Microsoft 365?
Follow Microsoft's shared mailbox setup steps in the Microsoft 365 admin center:
- Sign in to the Microsoft 365 admin center at admin.microsoft.com
- Go to Teams & groups > Shared mailboxes
- Click + Add a shared mailbox
- Enter a display name and email address for the mailbox
- Click Save changes
- On the next screen, click Add members and search for the users who need access
- Select each member and click Save
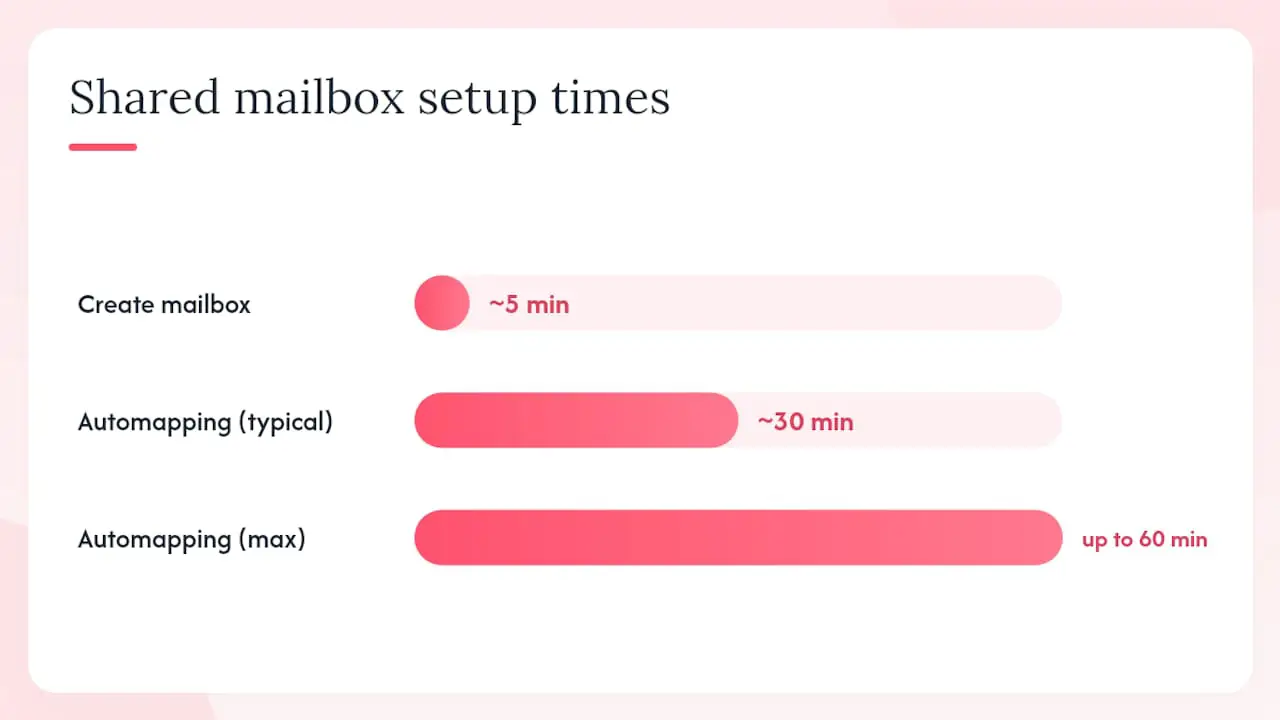
After saving, wait a few minutes, then close and restart Outlook. With automapping enabled, the shared mailbox should appear without manual setup. Microsoft notes that automapping works for permissions assigned directly to an individual user, not through a security group. Users added through a security group need to add the mailbox manually.
Microsoft says the shared mailbox account is blocked from direct sign-in by default, and that is intentional. Do not unblock it. To manage the mailbox in OWA, use your own credentials and open the shared mailbox from there.
Converting an existing user mailbox to a shared mailbox is also possible. This can be useful when an employee leaves and you want to preserve their email address as a team inbox. Follow Microsoft's conversion and licensing steps before removing the original license.
Pro Tip: To add members through Exchange Online PowerShell, run: Add-MailboxPermission -Identity "support@contoso.com" -User "jsmith@contoso.com" -AccessRights FullAccess -AutoMapping $true for each user. Grant Send As separately. For sign-in controls, use the Microsoft 365 admin center or current Microsoft Graph PowerShell guidance.
What do Full Access, Send As, and Send on Behalf actually mean?
Permissions are where most shared mailbox confusion starts. Microsoft documents the differences between Full Access, Send As, and Send on Behalf.
Full Access lets a user open the shared mailbox, read messages, move items, and manage folders. It does not allow the user to send email. Without a separate send permission, a user with only Full Access will see the mailbox but cannot reply from it.
Send As lets the user send email that appears to come directly from the shared address. The recipient sees support@yourcompany.com in the From field, with no indication of which individual sent it. This is the standard choice for most support and team inboxes.
Send on Behalf lets the user send email where the From field reads “Sender Name on behalf of Shared Mailbox Name.” The recipient can see both identities. This is useful when transparency about who sent the message matters, for example when an executive assistant sends on behalf of a department head.
| Permission | Can open mailbox | Can send as shared address | Recipient sees |
|---|---|---|---|
| Full Access only | Yes | No | N/A |
| Send As | No (unless paired with Full Access) | Yes | Shared address only |
| Send on Behalf | No (unless paired with Full Access) | Yes (with attribution) | “User on behalf of Shared Mailbox” |
| Full Access + Send As | Yes | Yes | Shared address only |
Recommended default for support teams: Grant Full Access + Send As to every User who needs both capabilities. This gives them full read/write access and lets them reply as the shared address without visible attribution to the recipient.
A few practical notes on automapping behavior:
- Automapping is enabled by default when you grant Full Access
- It only works for direct user assignments, not security group assignments
- To disable automapping for a specific user (useful when someone manages many shared mailboxes), use PowerShell:
Add-MailboxPermission -Identity "support@contoso.com" -User "jsmith@contoso.com" -AccessRights FullAccess -AutoMapping $false - Send As and Send on Behalf permissions are set separately from Full Access and do not trigger automapping
How do you add a shared mailbox in each Outlook client?
The steps differ by client. Start with Microsoft's current Outlook shared mailbox instructions, then use the steps for your client below.
New Outlook for Windows
If automapping is enabled, the shared mailbox should appear after you restart Outlook. If it does not:
- In the folder pane, right-click your account name
- Select Add shared folder or mailbox
- Enter the shared mailbox name or email address and select it
Classic Outlook desktop
Automapping handles this in most cases. If the mailbox does not appear after restarting:
- Go to File > Account Settings > Account Settings
- Select your Exchange account and click Change
- Click More Settings > Advanced tab > Add
- Type the shared mailbox name or email address and click OK
Outlook on the web (OWA)
To open a shared mailbox in OWA, click your profile picture in the top right, then select Open another mailbox. Type the shared mailbox address and click Open. This opens the mailbox in a separate browser tab. To add it as a persistent folder in your left nav, right-click Folders in the left panel, choose Add shared folder or mailbox, and enter the address.
Outlook for Mac
Outlook for Mac does not support automapping. Every user must add the shared mailbox manually:
- Go to Tools > Accounts and select the account with access
- Select Delegation and Sharing, then Shared With Me
- Select +, find the shared mailbox, and add it
Troubleshooting checklist if the mailbox does not appear:
- Restart Outlook and wait up to one hour for automapping to propagate
- Confirm the admin granted Full Access directly to your user account (not via a security group)
- Try adding the mailbox manually using the steps above for your client
- Verify the mailbox is visible in the Exchange admin center and that your account is listed as a member
How do you use a shared mailbox on Outlook mobile?
Outlook for iOS and Android both support shared mailboxes, but the experience works a bit differently than desktop. The official mobile add flow is straightforward:
- Open the Outlook mobile app and tap your profile icon in the top left
- Tap Add account
- Select Add a Shared Mailbox
- Enter the shared mailbox email address
- Tap Add Mailbox
The shared mailbox then appears in your account list in Outlook mobile. This feature requires both your primary mailbox and the shared mailbox to be in Exchange Online and use Microsoft's native sync technology.
Pro Tip: If the shared mailbox option is missing, confirm that you are signed in to the primary account that has permission to access it.
How does sending and Sent Items work in a shared mailbox?
When composing or replying, show the From field if needed and select the shared mailbox address. The first time, you might need to choose Other email address and enter the shared address.
Always check the From field before sending. Full Access alone is not enough to send; you also need Send As or Send on Behalf permission.
Sent Items behavior is one of the most common pain points. By default, a sent message may land in the sender's personal Sent Items folder rather than the shared mailbox's Sent Items. Microsoft documents a setting that copies sent messages to the shared mailbox Sent Items folder. An admin can enable it via PowerShell:
Set-Mailbox -Identity "support@contoso.com" -MessageCopyForSentAsEnabled $true -MessageCopyForSendOnBehalfEnabled $true
Once enabled, copies of replies sent as the shared address appear in the shared Sent Items folder, so the whole team can see what was sent.
Signature limitations and workarounds:
- In new Outlook, you can create multiple signatures and choose one while composing
- In classic Outlook, each user can create and manually select an appropriate shared-mailbox signature
- Do not enable direct sign-in to the shared mailbox just to manage a signature
- For centralized signatures, use an organization-approved signature management approach
Server-side rules set for the shared mailbox are another useful tool. They can route or categorize incoming messages without depending on one User's desktop Outlook session.
What are the storage limits and when do you need a license?
Microsoft's shared mailbox licensing guidance says a shared mailbox can remain unlicensed with up to 50 GB of storage, while each User accessing it needs a licensed Exchange Online mailbox. Review that guidance when the mailbox approaches its storage limit or needs archiving, litigation hold, or another licensed feature.
| Scenario | License needed? | Storage available | Source |
|---|---|---|---|
| Basic shared inbox under the 50 GB unlicensed limit | No license needed | Up to 50 GB | Microsoft licensing guidance |
| Inbox exceeding the 50 GB unlicensed limit | Exchange Online Plan 2 license required | Up to 100 GB | Microsoft licensing guidance |
| Archive mailbox (In-Place Archive) | Exchange Online Plan 2, or Plan 1 plus Exchange Online Archiving | Archive limits depend on licensing and configuration | Microsoft licensing guidance |
| Litigation hold or In-Place Hold | Exchange Online Plan 2, or Plan 1 plus Exchange Online Archiving | Retention capacity depends on licensing and configuration | Microsoft licensing guidance |
| Advanced compliance or eDiscovery | Feature-specific licensing may be required | Varies by feature and license | Microsoft licensing guidance |
If your shared mailbox is under 50 GB and you do not need archiving, litigation hold, or another licensed feature, it can remain unlicensed. To increase its mailbox limit to 100 GB, assign Exchange Online Plan 2. In-place archiving and litigation hold require Plan 2 or Plan 1 with the Exchange Online Archiving add-on. Advanced compliance features can have additional licensing requirements.
Before removing a license from a converted mailbox, follow Microsoft's conversion guidance and check the mailbox size and enabled features.
How do you fix a shared mailbox that is not showing up or sending correctly?
Most shared mailbox problems fall into a handful of categories. Work through this list alongside Microsoft's shared mailbox troubleshooting guidance.
If the mailbox is not appearing in Outlook:
- Restart Outlook and wait up to one hour for automapping to propagate
- Confirm Full Access was granted directly to the user account, not via a security group
- Add the mailbox manually using the client-specific steps in the section above
- In the Exchange admin center, verify that the mailbox exists and the user has the required delegation under Recipients > Mailboxes
If automapping is not working:
- Check that the permission was set with
-AutoMapping $true(the default) and not explicitly disabled - Security group membership does not trigger automapping; only direct user assignments do
- Remove and re-add the permission via PowerShell to force a refresh:
Remove-MailboxPermissionthenAdd-MailboxPermission
If you get a “You do not have permission to send the message” error:
- Full Access alone does not grant send rights; verify Send As or Send on Behalf is also assigned
- In the Exchange admin center, go to Recipients > Shared > select the mailbox > Manage mailbox delegation and confirm the send permission is listed
- Allow up to 60 minutes for permission changes to propagate before testing again
- Via PowerShell, check current permissions:
Get-RecipientPermission -Identity "support@contoso.com"
Admin-level checks:
- Verify the shared mailbox is not hidden from the address list (this can prevent it from being found during manual add)
- Confirm the mailbox is not over its storage quota, which can block sending
- Check the Exchange admin center’s message trace if a specific message is not delivering
What are the real limitations of shared mailboxes and how do you manage them well?
A shared mailbox is a coordination tool, not a collaboration platform. That distinction matters operationally.
Security non-negotiables:
- Always keep the shared mailbox account blocked from direct sign-in, as required by Microsoft's guidance. Delegated access also avoids sharing one mailbox password.
- Never create a password for the shared mailbox account or convert it to a licensed user just to bypass delegation. That approach destroys auditability and creates a shared credential security risk.
- Manage access through delegation (Full Access and an appropriate send permission). Microsoft enables mailbox auditing by default for supported owner, delegate, and admin actions, but administrators should confirm that their audit configuration meets their requirements.
Scalability limits:
Microsoft documents a maximum of 25 users for a shared mailbox and warns that simultaneous access by too many users can cause connection failures or duplicate messages. As team size and message volume grow, the absence of native ticket assignment and SLA tracking can also become an operational problem. Teams then need explicit ownership conventions or a dedicated helpdesk.
Operational best practices that actually work:
- Use color categories to signal ownership: assign a category (e.g., “In Progress - Sarah”) when you pick up a message, and remove it when resolved
- Create server-side rules in OWA to auto-route specific senders or subjects to subfolders, reducing inbox noise
- Appoint a daily owner or on-call User responsible for the inbox during their shift, so there is always one person accountable for triage
- Set the Sent Items copy setting (
MessageCopyForSentAsEnabled) so all sent replies are visible to the whole team - Never move messages from the shared mailbox to a personal folder; keep everything in the shared mailbox so the team has full context
Do-not-do list:
- Do not grant access via security groups if you want automapping to work
- Do not rely on personal Sent Items for shared mailbox replies
- Do not use the shared mailbox as a personal archive by moving unrelated messages into it
Pro Tip: Audit shared mailbox membership quarterly. People change roles, leave teams, or leave the company, and stale Full Access permissions are a security gap. In the Exchange admin center, pull the membership list under Recipients > Shared and cross-reference it with your current team roster.
Key Takeaways
A shared mailbox in Microsoft 365 gives teams a delegation-based shared address that can remain unlicensed up to 50 GB, but the people using it need licensed Exchange Online mailboxes. It also requires deliberate permission setup and operational discipline to avoid missed replies and security gaps.
| Point | Details |
|---|---|
| Admin creates, members access | Only an admin can create the mailbox; grant Full Access + Send As directly to each user, not via security groups. |
| 50 GB unlicensed, license when needed | The mailbox can remain unlicensed up to 50 GB; Microsoft requires Exchange Online Plan 2 to increase the mailbox limit to 100 GB. |
| Block sign-in always | Keep the shared mailbox account blocked from direct login to preserve audit trails and security. |
| Operational discipline required | Use categories, server-side rules, and a daily owner to prevent missed or duplicate replies. |
| Deskhero for teams that need more | When ticket assignment, SLAs, or reporting become necessary, Deskhero connects your Microsoft 365 mailbox to a helpdesk workflow. |
The shared mailbox works until it does not
A shared mailbox is useful for a small team with manageable volume and clear operating rules. Problems start when a team treats mailbox visibility as a substitute for ownership.
Everyone can see the inbox, but that does not tell the team who is responsible for each message. A daily owner, a category system, and a clear rule for unowned messages can reduce missed work.
Sent Items visibility matters too. When replies remain only in personal Sent Items, other Users lack a complete view of the conversation. Enabling MessageCopyForSentAsEnabled helps preserve that shared context.
Consider a helpdesk when the team spends too much time coordinating ownership or needs formal assignment, SLA tracking, and reporting.
When your team outgrows the native shared mailbox
At some point, categories and daily owners are not enough. When your support team needs clear ownership, SLA tracking, or first-response reporting, the native shared mailbox has reached its operational limit.
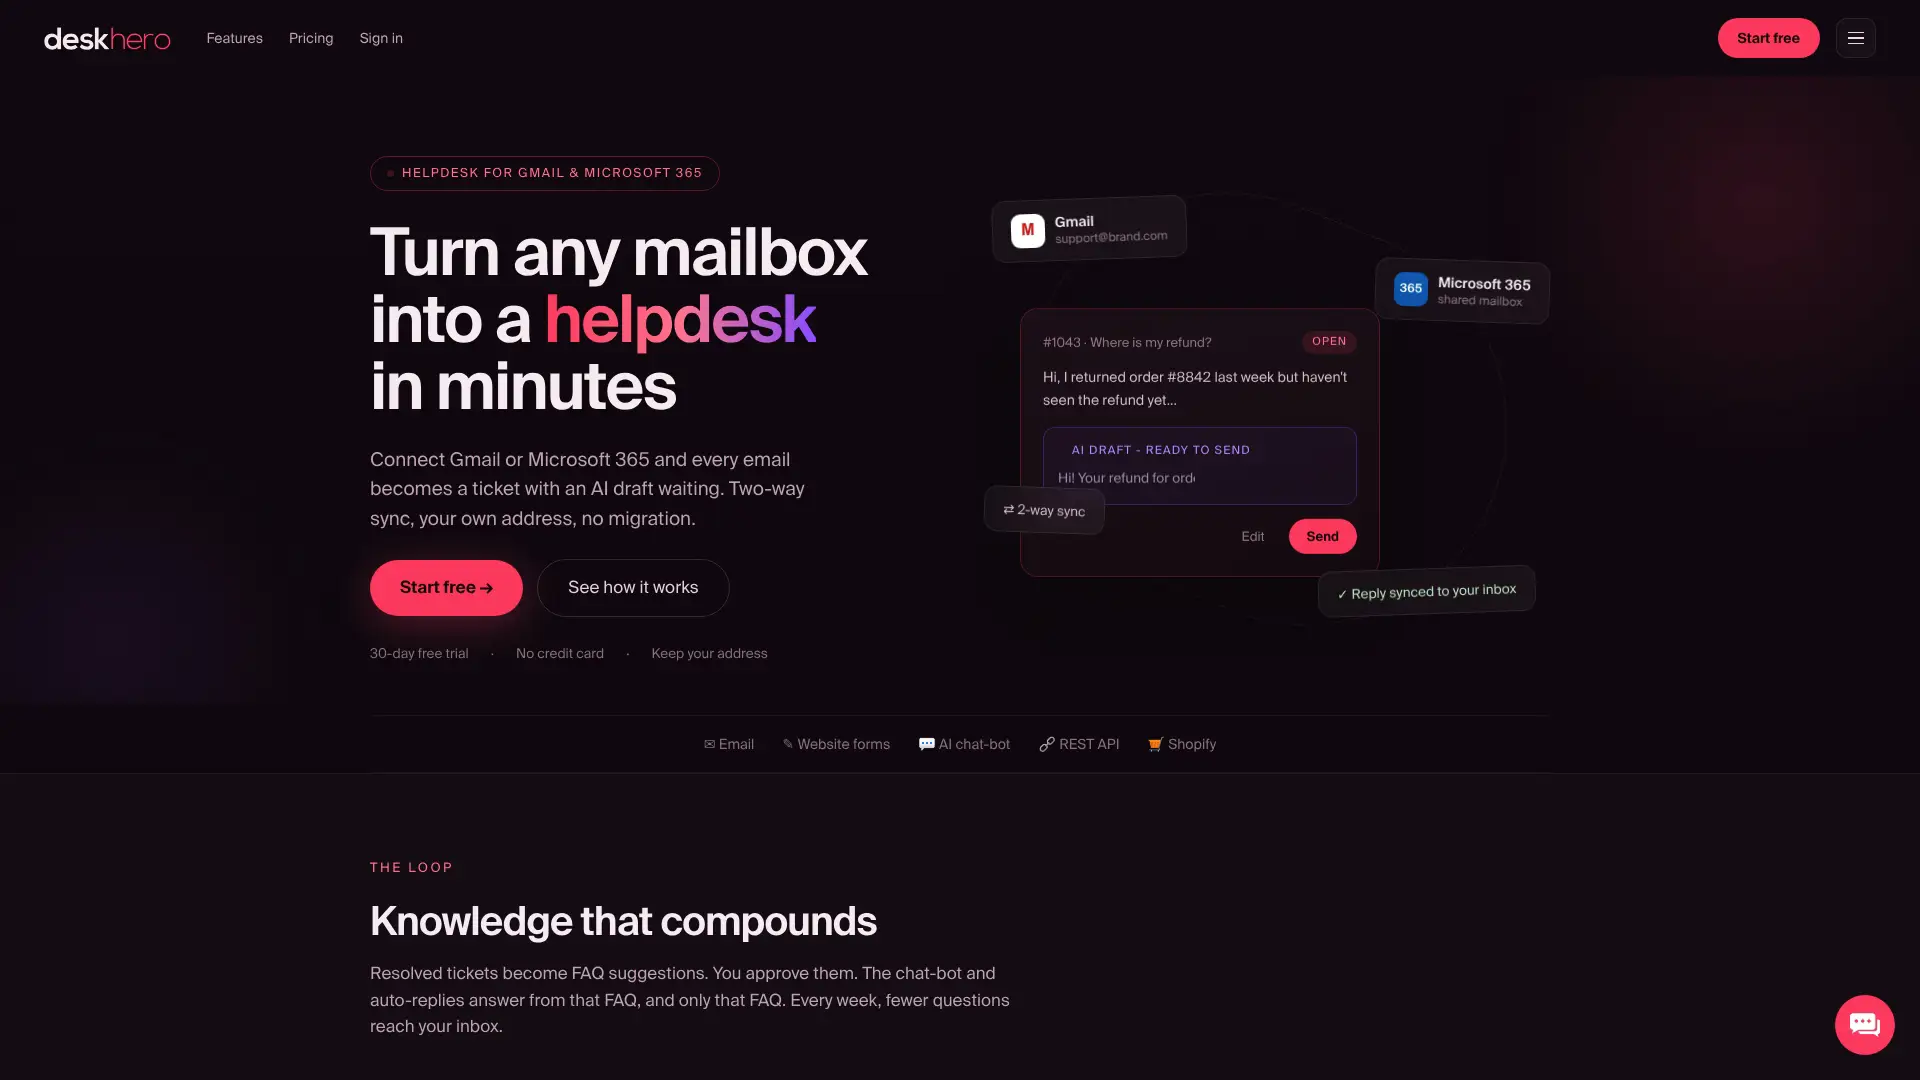
Deskhero connects directly to your existing Microsoft 365 mailbox and turns it into a ticketed shared inbox without a new email address or a migration. Incoming email becomes tickets that can be assigned to Users and groups. Deskhero includes automation rules, SLA policies, Statistics, AI-drafted replies grounded in workspace knowledge, and a Topics cluster that maps themes across tickets. Two-way email sync means customers still receive replies from your company address. Automatic replies are opt-in.
Useful sources
Official Microsoft documentation is the authoritative reference for setup, permissions, and licensing. These pages are maintained by Microsoft and reflect current product behavior:
- About shared mailboxes in Microsoft 365, Microsoft Learn
- Open and use a shared mailbox in Outlook, Microsoft Support
- Create a shared mailbox, Microsoft 365 admin
- Exchange Online limits, Microsoft Learn
- Considerations / Limitations for Microsoft 365 Shared Mailboxes - UTD Atlas KB
- Grant Access to a Shared Mailbox in Microsoft 365 - Deskhero
Follow the official Microsoft Learn and Microsoft Support pages for licensing and compliance updates, as limits and feature availability change with each Exchange Online service update.
FAQ
What is a shared mailbox in Outlook?
A shared mailbox is a delegation-based mailbox in Microsoft 365 that multiple users access with their own credentials to send and receive email from a common address like support@ or info@. See Microsoft's shared mailbox guidance for current licensing, storage, and sign-in requirements.
What are the main disadvantages of using a shared mailbox?
Shared mailboxes lack native ticket assignment and SLA tracking, so teams must rely on manual conventions such as categories and daily owners to reduce duplicate or missed replies.
How is a shared mailbox different from a Microsoft 365 group inbox?
A shared mailbox uses delegation (Full Access, Send As) and appears as a standard mailbox in Outlook, while a Microsoft 365 group has its own membership model, a group inbox, a shared calendar, and a SharePoint site. Groups are better suited for team collaboration and large audiences; shared mailboxes are better for a team address that needs to send and receive as a single identity.
How do I access my shared mailbox in Outlook?
If your admin granted you Full Access directly, the shared mailbox should appear in Outlook after you restart it. If it does not, use File > Account Settings > Account Settings in classic Outlook. In new Outlook, right-click your account in the folder pane and select Add shared folder or mailbox.
When should a team switch from a shared mailbox to a helpdesk tool?
The clearest signal is when your team starts spending time coordinating who owns which email rather than answering it. If you need ticket assignment, first-response reporting, or SLA policies, Deskhero can connect to your existing Microsoft 365 mailbox and add those capabilities without requiring a new email address or migration.